Categories
Elephant Garlic (1) Softneck Garlic-> (32) Hardneck Garlic-> (4) Water Kefir (1) Shallots (2) All Products ... Sponsors |
Garlic Growing InfoAll domestic garlic falls into two distinct sub-species:
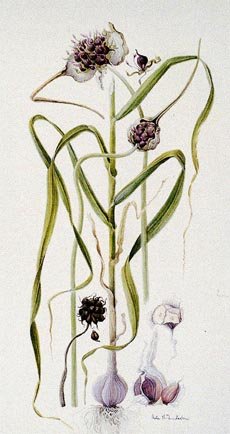
1) Hardneck (subspecies Ophioscorodon): These send up a central stalk, which if left to mature, is topped with a flowering seed cap (this is a scape and where bulbils are formed). It has large, easy-peeling cloves, and a rich, aromatic flavor that is not too spicy. They are preferred for more northern climates and can be stored for 3 to 6 months. They typically contain 5 to 11 cloves per bulb clustered around a central wood stem.
2) Softneck (subspecies Sativum): These are the braiding garlic which usually do not produce a flower spike (scape), are easier to grow, more productive, more adaptable than the hardneck type and generally have a spicier flavor. They can be stored for up to a year or more under proper conditions. They typically have 12 to 20 cloves per bulb, sometimes as many as 40, and often have small, interior cloves.
Soil & Culture: Garlic prefers a rich,
well drained soil, full sun, ample soil moisture, and should be weed-free throughout
the season. In mild climates (growing zones 7 to 10), garlic can be planted
from September through March. Fall planting produces larger and earlier yields.
In colder climates (growing zones 3 to 6), the optimal planting time is about
6 weeks before the soil freezes (i.e.: early October to early November). To plant, separate the bulbs into individual cloves, placing the flat, scar end down so that the top of the bulb is two (2) inches below the soil surface. General plant spacing is about 6" apart between cloves and 8" apart between rows for regular garlic; for elephant garlic increase the space by a few inches on all sides. Mulch immediately after planting with leaves, straw, or old hay. To ensure the most robust and vigorous plants, apply a liberal top-dressing of compost in spring when young garlic is forming new leaf blades. Provide a steady supply of water until just before harvest. To plant bulbils, separate any clustered bulbils. Plant with the little scar side down about 1/2-1" deep and 2" apart. Keep weed free. Mulch after you see the slender little garlic greens come up. Dig in spring or summer when you see the plants start to die back (or before). You should get some small bulbs from these bulbils or a few rounds (a single, round bulb with no cloves). Replant the rounds and cloves as per the above instructions, in the Fall, at the right time for your growing zone. To plant Elephant Garlic corms, you will need some preparation. They need to be soaked at least overnight or for 24 hours prior to planting. In addition, you need to allow moisture inside the hard outside shells. It is recommended that you either rub each corm with sandpaper in one spot until the outer shell thins or weakens, OR you CAREFULLY put a small slit in each corm with a razor blade. This will allow the soaking solution to get inside and gently swell the corms so they have better germination rates. Plant at least 4” apart about 1-1.5” deep. It may take up to two months before you see anything emerge from the soil from these corms. Keep the area weed-free in the interim. And easier way to germinate corms is to allow Mother Nature to do it for you. Upon harvesting your mature elephant garlic bulbs in summer, put aside all the corms. Prepare a weed-free bed for them and plant them in mid-summer. This allows the soil to slowly break down their outer hard shell so that they emerge in the Fall when they’re supposed to. Harvest: As day length and temperatures increase in late spring, leaf growth ceases and bulbs begin to form. At this point, you may need to reduce irrigation since waterlogged soils will cause garlic to mold or stain. As harvest approaches, plants will dry from the lowest leaf upward, and from the leaf tip to the steam. For softneck garlic, when the bottom three leaves are brown, you should harvest. For hardneck garlic, when the top 3-5 leaves are brown, it’s time. For optimal bulbs with good storage, never let more than half the plant turn brown before you harvest. Harvest by digging the bulbs out if your soil is too heavy. Otherwise, if you have loamy soil, you may be able to gently pull each bulb out. Hang the bulbs inside a storage shed that has lots of air circulation. Do not leave them exposed to direct sunlight or they will sunburn. Hardneck garlic will be fully cured in 2 to 3 weeks under low humidity conditions. Allow more curing time and provide a fan or additional heat if high humidity or wet weather persists. Softneck garlics require more curing time (3 to 4 weeks) since they contain several layers of cloves. Elephant garlic, due to its size, may require up to six weeks to cure properly. When curing is complete, cut the stalks about one-half inch above the bulbs and trim the roots, if desired, and store in netted bags at room temperature or slightly cooler (60-70 degrees F). If bulbs begin to shrivel in storage, move them to a moister environment so they will retain their fullness and vitality. Elephant Garlic: treat as you would any garlic. I’ve found it stores VERY well. Plant at the same time as hardneck varieties although in zone 6 (KY) I’ve also planted it during a warm spell in February (mid-winter) and have had excellent results and full-sized bulbs by the end of July. Elephant garlic also produces a seed spike (aka scape). Since most elephant garlic seeds are sterile, it’s not recommended to allow the scape to mature since the energy required to mature seeds will be taken away from the size of the bulb. Snap off the scape as soon as it appears (usually 1-2 mos. before harvest). Scapes from hardneck varieties make an excellent pesto sauce. Take a handful of fresh, young scapes. Remove the seed tops. Cut off any woody parts at the bottom. Puree them in your food processor. Add ground pine nuts or walnuts and then some Parmesan cheese and salt. While the processor is whirling, drizzle in olive oil until a paste is formed. Serve over hot pasta, tossing just enough to coat each strand. Yum! CLICK HERE for PDF file of this information |
Important LinksWho's OnlineThere currently are 8 guests online. |


Your IP Address is: 13.59.72.129
Copyright © 2024 Bobbett's Naturally Grown. Website Design by Wolfden Creations